Resources
How to select the right GPU for your AI workload
Selecting the right GPU for your AI workload can be the difference between hitting targets and quietly burning seven figures in cloud spend. MLPerf 3.1 benchmark shows that upgrading from NVIDIA’s A100 to the H100 boosts inference throughput by 1.7–3.9× and lifts performance-per-dollar by up to 1.8×—savings you only get when hardware and workload align.
Yet most clusters fall well short. When GPT-4 was trained on 25,000 A100s, average utilisation hovered at just 32–36%, and academic audits report GPU usage swinging anywhere from 20% to 80%. In effect, you may be paying for five GPUs, but using only two.
In this article, you’ll learn how to close that gap by mastering the three levers that drive GPU ROI:
- Architecture fit (matching chip features to model needs)
- Memory-bandwidth alignment (avoiding bottlenecks)
- Cluster topology (optimising interconnect and scale)
We’ll then walk through a selection matrix and a simple cost model you can apply to training, fine-tuning, or real-time inference—so you can stop overpaying and start getting predictable performance.
What determines GPU selection?
To stop wasted cloud spend, you must master the key factors that determine true GPU efficiency. Every dollar lost to low utilisation or unpredictable performance ultimately traces back to the interplay—or misalignment—of three technical factors: architecture fit, memory-bandwidth balance, and cluster topology.
Nail these factors, and you reclaim cloud waste, freeing up significant budget. Miss them, and you continue to overpay while your engineering teams face delays. Let’s break down each factor, showing the data that demonstrates its impact, and, crucially, provide the precise questions you should ask before approving future AI hardware investments.
1. Architecture fit
Think of a GPU as a specialised engine with different parts optimised for different tasks. Different neural-network operations heavily stress specific units within the GPU. For instance, transformer layers primarily rely on Tensor Cores for matrix operations, while older convolution layers might use general-purpose CUDA cores. If your model's core computations don't align with the GPU units designed to accelerate them, that expensive hardware sits idle, regardless of its theoretical speed (advertised FLOPs). It’s like using a Formula 1 car for city errands – powerful, but inefficient for the actual job.
Benchmarks like MLPerf 3.1 Inference (Closed division) clearly show this. NVIDIA’s H100 delivers dramatic performance gains (1.7×–3.9× more queries per second than the A100) primarily on workloads that keep its advanced Tensor Cores busy, like large transformer models.
MLPerf 3.1 inference benchmarks (Closed Division)
| Workload | H100 vs A100 Speedup | Notes |
|---|---|---|
| BERT-Large | 3.1× | Tensor Core-heavy |
| GPT-J 6B | 2.4× | Memory bandwidth matters |
| ResNet-50 | 1.7× | I/O-bound, smaller gains |
| RetinaNet | 1.8× | Object detection |
Source: MLCommons MLPerf Inference v3.1 results, August 2023
However, on tasks dominated by data movement or older kernel types, such as many I/O-heavy object-detection models, the H100's advantage over the A100 shrinks significantly because the GPU is waiting on data or non-Tensor operations rather than matrix operations.
How to assess architecture fit
To understand if your model aligns with a GPU's architecture, get these key metrics from workload profiling tools like NVIDIA’s Nsight Systems:
- FLOP/byte ratio: Measures computation relative to data moved.
- Tensor core vs. CUDA core time: What percentage of active compute time is spent on Tensor Core operations?
- Mixed-precision speedup: How much faster your model is using FP16 or BF16 precision compared to FP32.
How to test
| Step | What to measure | Rule of thumb |
|---|---|---|
| 1. Profile FLOP/Byte | Use nsys or torch.cuda.profiler to capture FLOPs ÷ bytes moved. | A ratio greater than 25 generally indicates compute-bound (benefits from high-FLOP GPUs); Less than 10 suggests memory-bound (architecture fit is less critical than bandwidth). |
| 2. Check Tensor vs. CUDA time | Review the kernel timeline in NVProf or Nsight Systems. | If over 65% of your model's compute time is spent on Tensor Cores, newer architectures like Hopper (H100) or Blackwell will likely provide substantial speedups. |
| 3. Compare mixed-precision speedup | Run one epoch in FP32 vs. BF16. | If the speedup is less than 25%, your bottleneck might not be core compute speed; focus assessment on bandwidth or topology instead. |
Key takeaway: Optimal architecture fit isn't about buying the newest or fastest GPU on paper. It's about rigorously matching your specific model’s computational profile to the GPU's acceleration capabilities. Request a profile report that includes these metrics before approving significant hardware expenditures.
2. Memory-bandwidth balance
Modern AI models, especially large language models and recommendation systems, transfer more bytes than they compute FLOPs. Tasks such as accessing massive embedding tables or managing key-value caches for LLM inference require transferring vast amounts of data to and from the GPU's high-bandwidth memory (HBM).
Even the fastest compute cores are useless if they constantly wait for data to arrive. When memory bandwidth becomes the limiting factor, simply adding more compute cores yields almost no return on investment.
Specs at a glance
| GPU | HBM type | Bandwidth |
|---|---|---|
| A100 40 GB | HBM2 | 1.55 TB/s |
| H100 80 GB | HBM3 | 3.2 TB/s (SXM) |
| H200 141 GB | HBM3e | 4.8 TB/s |
The real-world impact of hitting a memory-bandwidth ceiling is significant, particularly for large models. For instance, in production Llama 2–70B serving, teams replacing A100 GPUs (often running FP16/INT8) with H100 GPUs utilising an optimised software engine like TensorRT-LLM for FP8 precision typically observe about 2–4× higher single-request (batch-1) throughput without needing to change the model code itself. This translates, for example, from roughly 0.8 inferences per second on an A100 to around 2–3 inferences per second on an H100.
The substantial uplift primarily results from removing a memory-bandwidth limitation: the H100 offers significantly higher HBM3 bandwidth (~3.35 TB/s) and native FP8 tensor core support, compared to the A100's approximately 2TB/s and lack of native FP8 acceleration.
While even higher gains (above 5×) are possible in specific scenarios, such as heavy in-flight batching on the H100 or by moving to the even higher-bandwidth H200, the 2-4× gain for single-request throughput driven by bandwidth and FP8 capability is a common and significant benefit.
How to spot a memory-bandwidth choke
Look for these indicators in your performance metrics:
- High Bytes/step: If your model moves > 1 TB per step on an A100 40 GB, kernels are likely stalled waiting for HBM data.
- High memory utilisation, low compute utilisation: GPU memory (>90% used) combined with low compute utilisation (MFU <60%) often indicates that the GPU is saturated by memory traffic. You need more bandwidth or a strategy to shard or reduce data size.
- Data-loader wait time: A significant amount of time (>15% of step time, even after pre-fetching) suggests the GPU is idle, waiting for data from the CPU or storage, which points to potential PCIe or data-pipeline bottlenecks, not just HBM.
Key question: Does your model's data movement requirements, particularly for large caches or embedding tables, align with the GPU’s HBM capabilities? Ensure bandwidth isn't the silent killer of your compute investment.
| Metric | What it measures | Typical range* | Why it matters for Llama‑2‑70B inference |
|---|---|---|---|
| Model FLOPs Utilisation (MFU) | Ratio of the model‑level FLOPs you actually execute per second to the GPU’s peak theoretical FLOPs at the same precision (FP8, FP16, …). Formula (single‑GPU run) MFU = (tokens / s) × (model FLOPs per token) ÷ GPU peak FLOPs | 0 – 1 (0 % – 100 %). Well‑tuned LLM training often hits 35 – 50 %. Low‑batch inference is usually far lower because it is memory‑bound. | If MFU is low while memory bandwidth or HBM utilization is high, the GPU cores are idle, waiting for weights to arrive. That tells you you’re bandwidth‑limited (A100 case) and would benefit from H100’s faster HBM3 + FP8 reductions. |
*Ranges from Google‑PaLM report.
3. Cluster Topology & Interconnect
Scaling AI training or inference across multiple GPUs introduces a new challenge: communication. In distributed workloads, GPUs constantly exchange gradients or model components over interconnects such as NVLink or PCIe. If the speed and architecture of these connections aren't optimised for the communication patterns (e.g., collective operations like all-reduce), the GPUs spend excessive time waiting for data from their peers.
This communication overhead can quickly negate the benefit of adding more hardware, turning powerful GPUs into expensive idle resources. The GPT-4 training mentioned earlier saw average utilisation on 25,000 A100s drop to just 32–36% MFU primarily because communication overhead became the dominant bottleneck at that scale.
One of the reasons it would take a lot fewer H100s to train the same model is that the NVLink 4.0 on the H100 delivers up to 900 GB/s of peer‑to‑peer bandwidth—a 50 % jump over NVLink 3.0’s 600 GB/s on the A100.
The Blackwell GPUs take this even further with NVLink 5.0, providing up to 1.8 TB/s per GPU, which doubles the H100’s figure and triples the A100’s. Such bandwidth is critical for keeping multi‑GPU AI workloads fed without becoming communication‑bound.
Moreover, the underlying network is of significant importance. Latency for collective operations grows rapidly (O(log N)) on standard Ethernet, while specialised networks like InfiniBand with features like SHARP can flatten this latency curve after a certain number of GPUs (e.g., 16), ensuring communication scales more efficiently.
A common guideline to maintain efficiency in multi-GPU clusters:
- Aim to keep communication time ≤ 25% of compute time for clusters up to 16 GPUs.
- Allow up to 50% communication time for very large, mega-scale clusters.
If your initial scaling tests fail to meet this ratio, simply adding more GPUs will likely cost more in hardware and wasted cycles than it delivers in performance gains.
Want to request a cluster spec from us? Speak to our team, and we’ll provide you with:
- Topology diagram: A visual representation showing the bandwidth and number of "hops" between any two GPUs in the cluster.
- All-reduce benchmark: Performance data showing the latency of key collective operations at your typical batch sizes and model sizes.
- Scaling curve: A graph plotting throughput (or samples/sec) against the number of GPUs used, clearly marking where the performance increase begins to flatten ("the knee").
Click here to contact us.
Key takeaway: Effective multi-GPU scaling relies on a topology and interconnect that minimises communication bottlenecks. Ensure you see and understand the benchmarks demonstrating efficient scaling before committing to a cluster design.
Putting the factors together
Sometimes it can be hard to see the utilisation data hiding the waste. However, optimising the three factors above directly impacts the true cost of your AI compute. Here is a simple formula that reveals the upside of optimising these three factors:
Effective $FLOP = List $/hr (1 – Discount)Peal TFLOPS MFU
- List $/hr: The cloud provider's hourly list price for the specific GPU instance (e.g., $2.99 per hour for an H100 SXM instance).
- Discount: Savings from committed-use contracts or reserved instances (often 20–40%).
- Peak TFLOP: The theoretical maximum performance of the GPU based on the vendor's specifications.
- Most-frequent utilisation (MFU): This metric, derived from real-world logs, indicates GPU core activity. Aim for at least 65% MFU for reasonable efficiency.
Raising the average GPU MFU from a common 35% to a more achievable 70% effectively cuts your cost per unit of computation (your effective $/FLOP) in half, even if you're using the same GPU type and have the same discount. This quantifiable impact is why optimising architecture fit, bandwidth, and topology isn't just a technical detail; it’s a direct driver of financial efficiency.
Before you spend, use these questions to challenge whether you have considered the factors driving infrastructure ROI:
Which architecture profiling metrics, such as the FLOP/Byte ratio or the percentage of Tensor Core usage, demonstrate that this GPU model specifically matches our workload's compute pattern?
What is the estimated amount of data accessed from HBM per step, and does it align with the proposed GPU's memory bandwidth capabilities without causing bottlenecks?
What is the projected communication-to-compute time ratio for our workload at the target cluster size, and how does the proposed cluster topology and interconnect prevent communication from becoming the primary bottleneck?
Has a utilisation test been run for at least one full training epoch, or for an inference benchmark, and can I see the MFU histogram showing typical core activity?
Based on the projected MFU, what is the calculated effective cost per FLOP, and how does this compare to the next-best GPU option at that same projected MFU?
In case you’re wondering why these matter, cloud spending is a top concern for leadership teams; surveys like Flexera's consistently show it's the number one priority for a large majority of leaders (84% in 2025).
Focusing solely on negotiating list-price discounts overlooks the massive inefficiency caused by low utilisation. Raising average GPU MFU by just 10 percentage points through smart infrastructure choices can cut operational expenses faster and more significantly than chasing another percentage point off the sticker price. That's the kind of tangible, bottom-line impact that earns applause from both finance and engineering leaders, ensuring your AI investments deliver maximum value.
Now that you know where ROI hides, the next section plugs these levers into a GPU‑selection matrix. We will rank the L40S, A100, H100, B100, and B200 across three common AI phases—prototype, fine‑tune, and large‑scale inference—and show a cost model you can copy‑paste into your own budgeting spreadsheet.
How to build a GPU‑selection matrix for every phase of the AI lifecycle
When deciding on a GPU, you green‑light an evolving stack that has to cover three very different phases of product life:
| Phase | What engineering needs | What finance cares about |
|---|---|---|
| Prototype / R&D | Fast turnaround on small or medium models (≤ 15 B params), lots of interactive runs. | Keep the hourly burn < $1 and avoid long reservations. |
| Fine‑tune / Deep Training | Multi‑GPU jobs on 30 B–100 B‑parameter models; steady MFU ≥ 65%; high memory bandwidth. | Lowest effective $/FLOP at ≥ 65% utilisation. |
| 24/7 Production Inference | Latency < 200 ms at thousands of QPS, predictable scaling. | Stable cost envelope per request and power efficiency. |
To compare cards apples‑to‑apples, we weigh five dimensions:
- Compute Throughput (FP16/FP8 TFLOPs)
- Memory footprint & bandwidth (VRAM GB, GB/s)
- Interconnect (NVLink 4, PCIe 5, NVSwitch)
- Typical On‑Demand Price (across seven GPU clouds)
- Energy draw (TDP W)
Each dimension is normalised 0‑10, summed, then rescaled to ☆ scores to keep the table readable. The table:
| GPU | VRAM / Bandwidth | On-Demand | Commit (1–36 mo) | Prototype | Fine-tune | 24 / 7 Inference | Why pick it |
|---|---|---|---|---|---|---|---|
| L40S 48 GB | 864 GB/s GDDR6 | $0.87/hr | $0.75/hr | ★★★★☆ | ★★☆☆☆ | ★★★★☆ | Cheapest latency card; Ada FP8 rocks notebooks & low-QPS endpoints, but GDDR stalls past 50 B training. |
| A100 80 GB | 1.9 TB/s HBM2e | $1.50/hr | $1.25/hr | ★★★☆☆ | ★★★★☆ | ★★★★☆ | Most $/GB value; mature stack rules 30 B-70 B fine-tunes if you hit 65 % MFU. |
| H100 80 GB (SXM) | 3.35 TB/s HBM3; NVLink 4 900 GB/s | $2.25/hr | $1.80/hr | ★★☆☆☆ | ★★★★★ | ★★★★★ | MLPerf 3.x shows 1.7 – 3.1 × A100 throughput on transformers; pays off once speed-up ≳ 1.4 ×. |
The B100, B200, and GB200 NVL72 are all priced on request; therefore, we will not discuss them in this scenario. Each ships with ≥ 192 GB of HBM3e and 8 576 TB/s of domain bandwidth.
Blackwell Quick Reference (B100/B200/GB200)
| Spec | B100 | B200 | GB200 NVL72 |
|---|---|---|---|
| HBM3e | 192 GB | 192 GB | 384 GB (2-chip) |
| Memory BW | 8 TB/s | 8 TB/s | 16 TB/s |
| FP4 Support | ✓ | ✓ | ✓ |
| NVLink 5.0 | 1.8 TB/s | 1.8 TB/s | 1.8 TB/s |
When to consider Blackwell: Model state exceeds 80GB per GPU, you need FP4 inference precision, or NVLink 5.0's 2× bandwidth improvement over H100 materially reduces your communication bottleneck. Otherwise, Hopper (H100/H200) delivers better price-performance.
Quick match: Common models → recommended GPU
| Model | Parameter Count | Min VRAM | Recommended GPU | Why |
|---|---|---|---|---|
| Llama-3-8B | 8B | 16 GB | L40S | Fits comfortably; $0.87/hr keeps inference costs low |
| Llama-2-70B | 70B | 140 GB (FP16) | H100 (×2) or H200 | H200's 141GB enables single-GPU serving |
| Mixtral 8×7B | 47B active | 90 GB | H100 | MoE architecture benefits from H100's bandwidth |
| GPT-4 class | 200B+ | 400+ GB | H100 cluster | Multi-node with NVLink 4.0 for gradient sync |
| Stable Diffusion XL | 6.6B | 24 GB | L40S | Image gen benefits from Ada architecture |
VRAM estimates assume FP16; INT8/FP8 quantization reduces requirements by ~50%.
How to read the matrix
- Start with the phase, not the card: A $0.75/hr L40S that finishes jobs before lunch beats an idle H100 every time.
- Check the utilisation lever: An H100 at 35% MFU costs the same effective $/FLOP as an A100 at 70%. Don’t pay for cores you can’t fill.
- Look one phase ahead: Moving from prototyping to fine‑tuning a 70 B model? L40S → A100 usually upgrades bandwidth and memory without a migration tax.
- Treat Blackwell as a future line item: Blackwell GPUs would be unnecessary unless your parameter count forces over 80GB per GPU. So, stick with Hopper until you exceed 80GB per GPU or need FP4.
Using the selection matrix, let’s walk through a mini cost model.
Scenario: fine‑tuning Llama‑2‑70B for 3 epochs on 350 M tokens. Since it’s fine-tuning, we will compare the A100 with the H100.
| Configuration | GPUs | Wall-hrs | MFU | $/GPU-hr | Run cost |
|---|---|---|---|---|---|
| A100 80 GB | 8 | 14 | 0.66 | $1.50 | $168 |
| H100 80 GB | 4 | 9 | 0.72 | $2.25 | $81 |
†Wall‑time projections use MLPerf 3.1 throughput ratios and assume equal optimisation effort.
H100 still reduces the bill by 52% compared to A100 and trims wall time by a third. L40S isn’t shown as it requires 48 GB of VRAM, which requires more than 16 GPUs for this workload and would cost more than an A100.
When faced with tasks like these, here are the four things that should be on your action list:
- Map each new project to a phase and a matrix row before approving spend.
- Demand a one‑epoch MFU report with both current and next‑tier GPUs.
- Bundle procurement with a rollback clause. If the promised MFU delta isn’t hit in two weeks, revert to the cheaper tier.
- Track effective $/FLOP monthly. Any reversal is a signal to revisit architecture fit, bandwidth, or topology factors we discussed earlier.
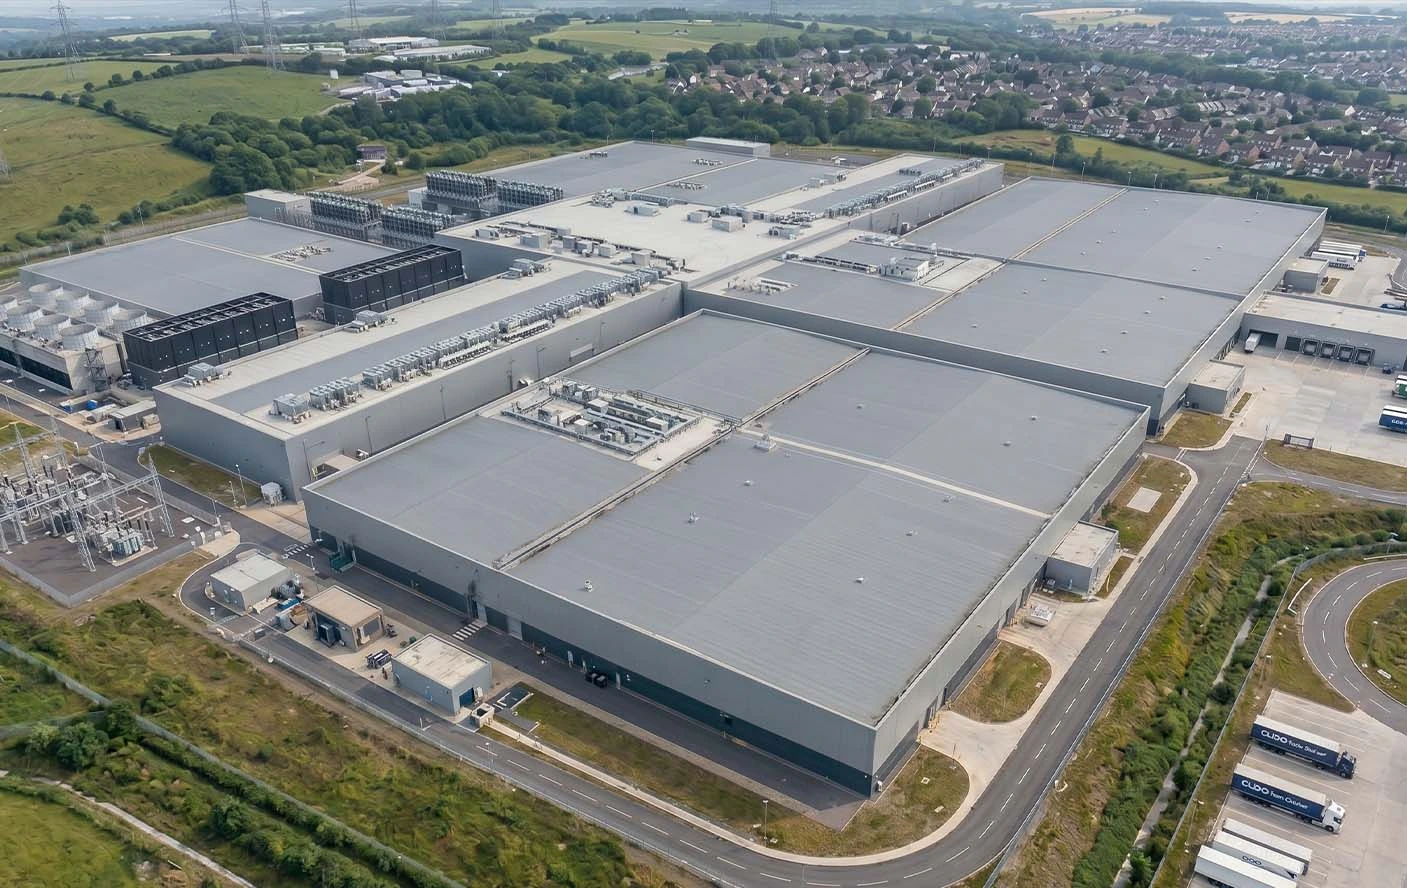
Once you’ve chosen the right GPU for each phase, the next hurdle is squeezing maximum utilisation out of every hour—CUDO’s hardware helps, but the guardrails below make the savings stick.
Operational guardrails for CUDO-built clusters
As discussed earlier, understanding the right GPU architecture, bandwidth, and topology provides the blueprint for cost-effective AI infrastructure. However, the difference between paying for peak power and using it efficiently comes down to operational discipline in everything that happens after selecting the optimal GPU.
The best AI teams implement these to keep budgets and throughput consistently in sync. Here are four essential operational guardrails to maximise your GPU ROI:
1. Hit the communication-to-compute targets
The communication-to-compute target is the ratio of the time GPUs spend communicating (sync time) versus computing. This is a direct indicator of cluster topology efficiency for your specific workload.
Here is the target:
Your sync time ÷ compute time should be less than 0.25 for clusters up to 16 GPUs. For clusters scaling beyond 16 GPUs, the ratio of sync-time to compute-time should be less than 0.50.
To ensure this, before production deployment, require a profile report (from tools like torch.profiler or nsys) on your planned batch size and cluster size. If this ratio exceeds the target, do not approve the full deployment until the issue is resolved, either by optimising the code, adjusting batch size, or reconsidering cluster size based on the workload's scaling properties.
2. Monitor MFU like revenue
We already discussed that MFU is the true measure of how busy your GPU cores are, showing the percentage of time they spend actively computing. The goal is to maintain an average MFU between 65% and 80% for active jobs.
A way to achieve this is to implement automated monitoring, for example, using NVIDIA’s Prometheus gpu_mfu metric scraped every 60 seconds. Set up critical alerts that page the on-call engineer if any high-value job replica drops below 50% MFU for more than 15 minutes.
MFU Alert Thresholds
| MFU Range | Status | Action |
|---|---|---|
| 75-85% | Optimal | Maintain current configuration |
| 65-74% | Acceptable | Review batch size and data pipeline |
| 50-64% | Investigate | Profile for bottlenecks; consider GPU downgrade |
| <50% | Critical | Page on-call; likely architecture mismatch or data starvation |
Set Prometheus alerts at 50% and 65% thresholds for proactive intervention.
Remember: an A100 running at 70% MFU delivers the same effective cost-per-FLOP as an H100 running at just 35% of its maximum fill rate (MFU). High utilisation is the most powerful discount program you have.
3. Balance CPU, dataloader, and storage
GPUs are computation engines, but they need a constant, fast supply of data. Slow data pipelines (CPU processing, storage I/O, PCIe transfers) will starve the GPU cores, causing them to wait idly even when power is available. Profilers show this waiting time as "stalls," which can be misdiagnosed as poor kernel performance.
Ensure that infrastructure teams allocate sufficient CPU (recommended: at least 8 vCPU) and RAM (recommended: at least 32 GB) per GPU for preprocessing, and utilise high-bandwidth storage (such as NVMe tiers) for training data.
Provide a quick benchmark demonstrating that the data loader wait time is below 15% of the total step time. Fix this first; GPU upgrades cannot solve a data pipeline problem.
4. Surface key metrics in plain business language
Ensure the critical drivers of AI infrastructure cost and performance are visible and understandable across teams by integrating infrastructure metrics into business reporting. For example, pipe data from your monitoring and billing APIs into a weekly digest, like a Slack channel visible to finance, engineering, and product, that tracks just three numbers:
- GPU hours by SKU: The raw consumption.
- Average MFU per job: The efficiency metric.
- Effective $/FLOP (7-day rolling): The true cost of computation, reflecting utilisation.
When all stakeholders see the same, clear numbers showing consumption and efficiency, discussions shift from arguments about technical specs to a shared goal of optimising the "Effective $/FLOP" scoreboard.
CUDO Compute can provide you with a correctly built and wired cluster foundation. Implementing these four operational guardrails keeps it at the optimal utilisation level, so every dollar you spend on GPU time translates directly into delivered AI features and business value.
If you need expert help selecting the right GPU for your workload, CUDO Compute has a team dedicated to helping you build the ideal cluster for your specific needs. Speak with an expert.